The gaming market boasts tons of games that engage an audience of 3.24 billion players worldwide. New titles, remakes, and hundreds of legendary must-have games – today’s library is truly massive. And if your goal is to attain fame in the gaming industry, you must set yourself apart with a unique creation.
Attention to detail is crucial. And your game’s 3D environment makes up the foundation that drives players’ engagement
This article delves into the essence of game environment modeling and its intricacies to help you discover the main stages of environmental design and learn how to achieve flawless results with your project.
But first, let’s see what’s what.
What Is Environment Design All About?
Designing and constructing a playable environment that serves as the backdrop for the story is the essence of creating a seamless virtual world. This complex process encompasses several stages, including overall game design, level design, level brief, and concept art ideation, as well as the outline of future animations, character, object, and background models, renders, and rigs.
But it all starts with the main design document that outlines the basics. This is then followed with an art guide document that turns general points into more actionable tasks for designers and artists. Environments usually start to get their shapes when designers draw up storyboards filled with early concept arts, visual schemes, and future animation sketches.
It’s important to consider the scale of the game you’re creating. Will it be a side-scrolling platformer with a few level mechanics or a massive open-world RPG with free exploration and no linear narrative? There will be limitations to consider, both positive and negative, and it is best done early on.
Where Does Game Environment Modeling Start?
With all the task reference docs in hand, a level designer may come in to start planning levels and conceptualize more pinpointed details (e.g., separate screens and scenes, plot twists, content fillers, etc.). And only then an environment artist joins in to kick off full-on environment modeling.
The environment artist’s job is to breathe life into all the sketches, concepts, and storyboards. They segment the flow of the planned game environment into comprehensive bits and scenes and shape a sizable, structured world with proper transitions and level of immersion.
Shaping Your Game Environment: How to Get the Most
An overwhelming number of game environments we see in modern games are 3-dimensional. Even when setting out to work on a simple indie side-scroller, chances are you will eventually tap into 3D environments or assets along the way.
That is because many developers approach environmental design from two different angles. By separating world foregrounds from more intricately detailed local environments, you can keep the workflow balanced and handle the ranging-complexity tasks with the right tools.
In simple words, you can combine low-poly and high-poly modeling approaches to shape models at different levels of detail and visualization requirements.
Low-poly game assets
Low-poly game environments involve the use of fewer polygons and less detail, making it an ideal choice for simple backgrounds and secondary assets. Creating a low-poly model requires less time and effort. Developers get to quickly execute their ideas using an engine like Unity, which offers great low-poly and low-code “building blocks” in its asset store.
High-poly game assets
On the other hand, high-poly game environments require more detail and fidelity to create a natural and aesthetically pleasing appearance. This type of modeling is suitable for foreground environments and assets that require greater attention to detail and realism – characters, moving objects, and everything that must stand out properly.
To strike a perfect balance, aim for an eye-candy of a visual “wrapper” for your game while supporting it with low-poly assets in places where performance is a higher priority than sheer visuals.
Modeling the Game Environment
Suppose the initial ideation is out of the way, and you are ready to kick off a game development project. The following set of stages is the most common way you carry original game environments through to their implementation.
These fundamental principles will help you organize the workflow or, at the very least, understand the general process.
So make sure to start with:
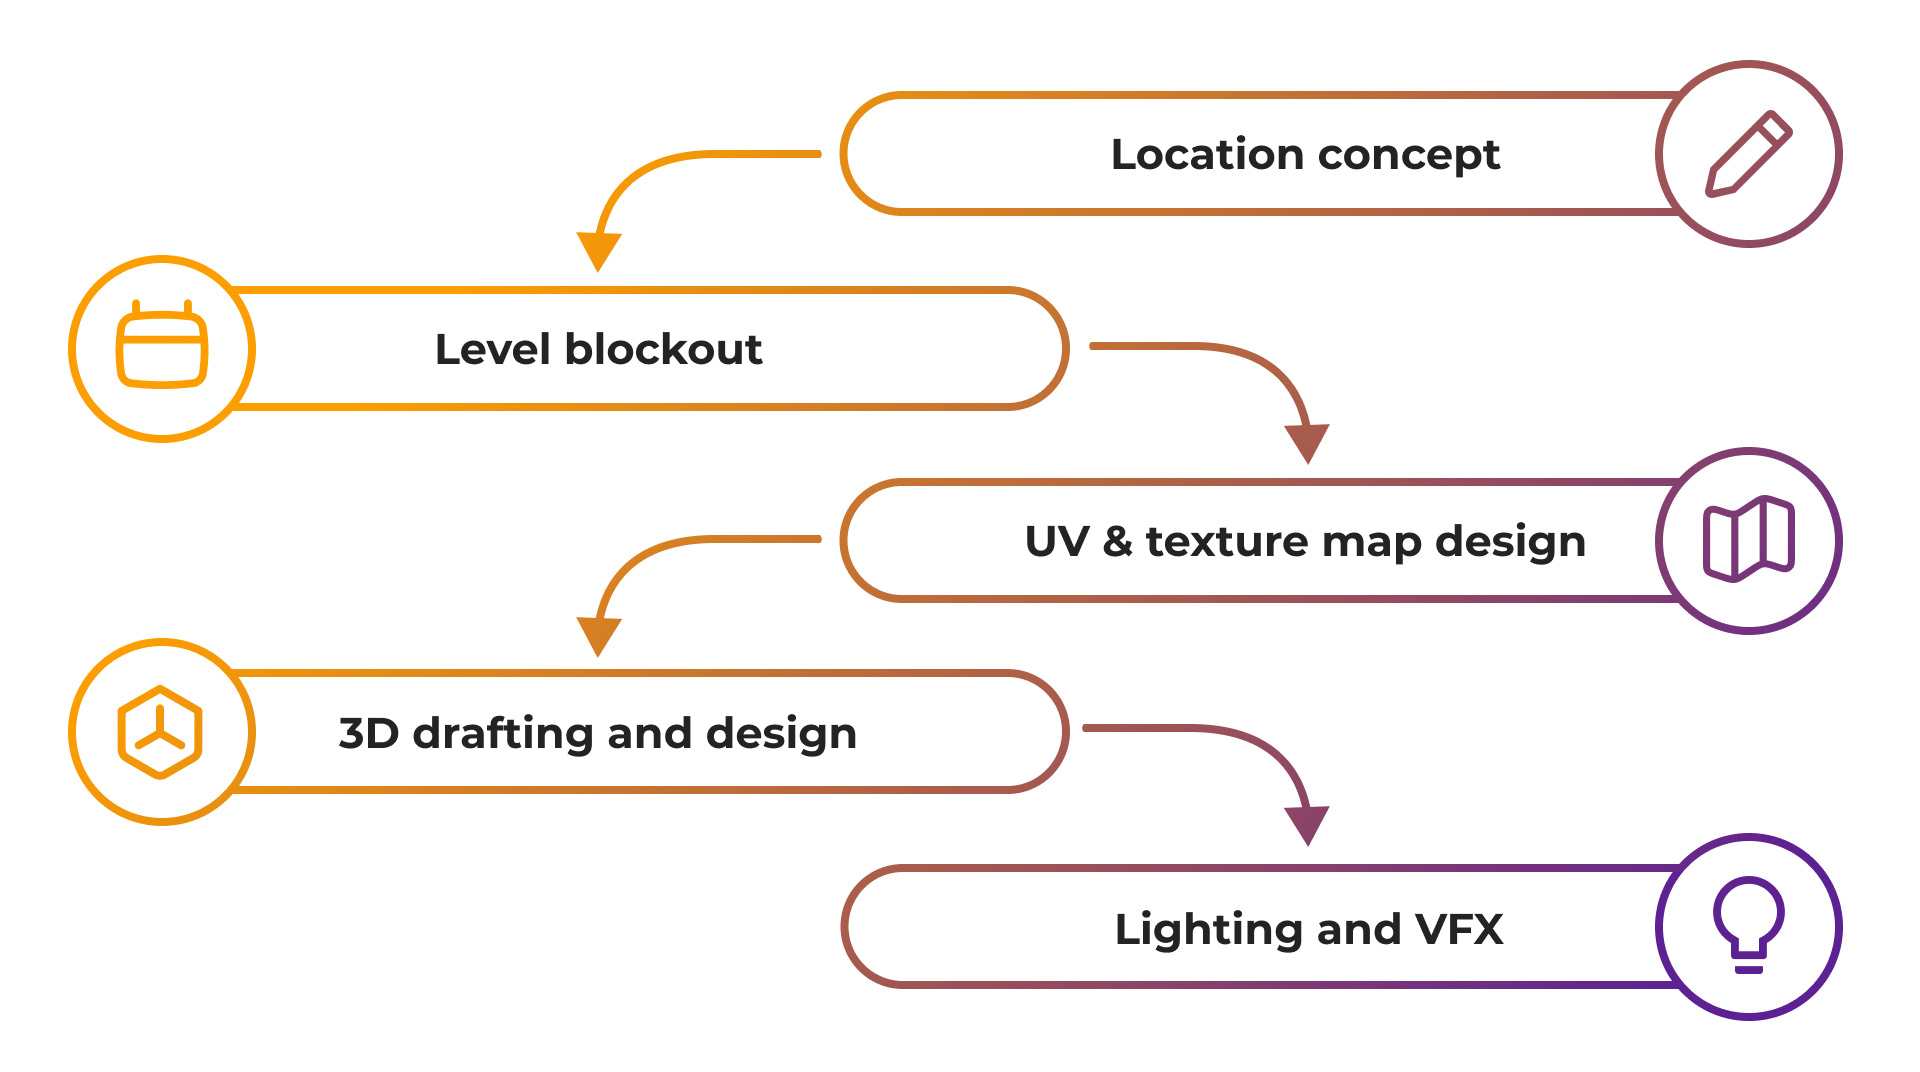
Location concept
Before setting off any production, it is essential to gather references and create concepts for the vision of the location you want to replicate, such as photos of rock from different angles, to create a realistic model.
The concept artist prepares a collection of concepts and references to outline the overall vision, atmosphere, mood, and key objects in the location. By carefully curating this visual framework, the concept artist sets the tone for the entire art production process, ensuring a cohesive and captivating experience for the players.
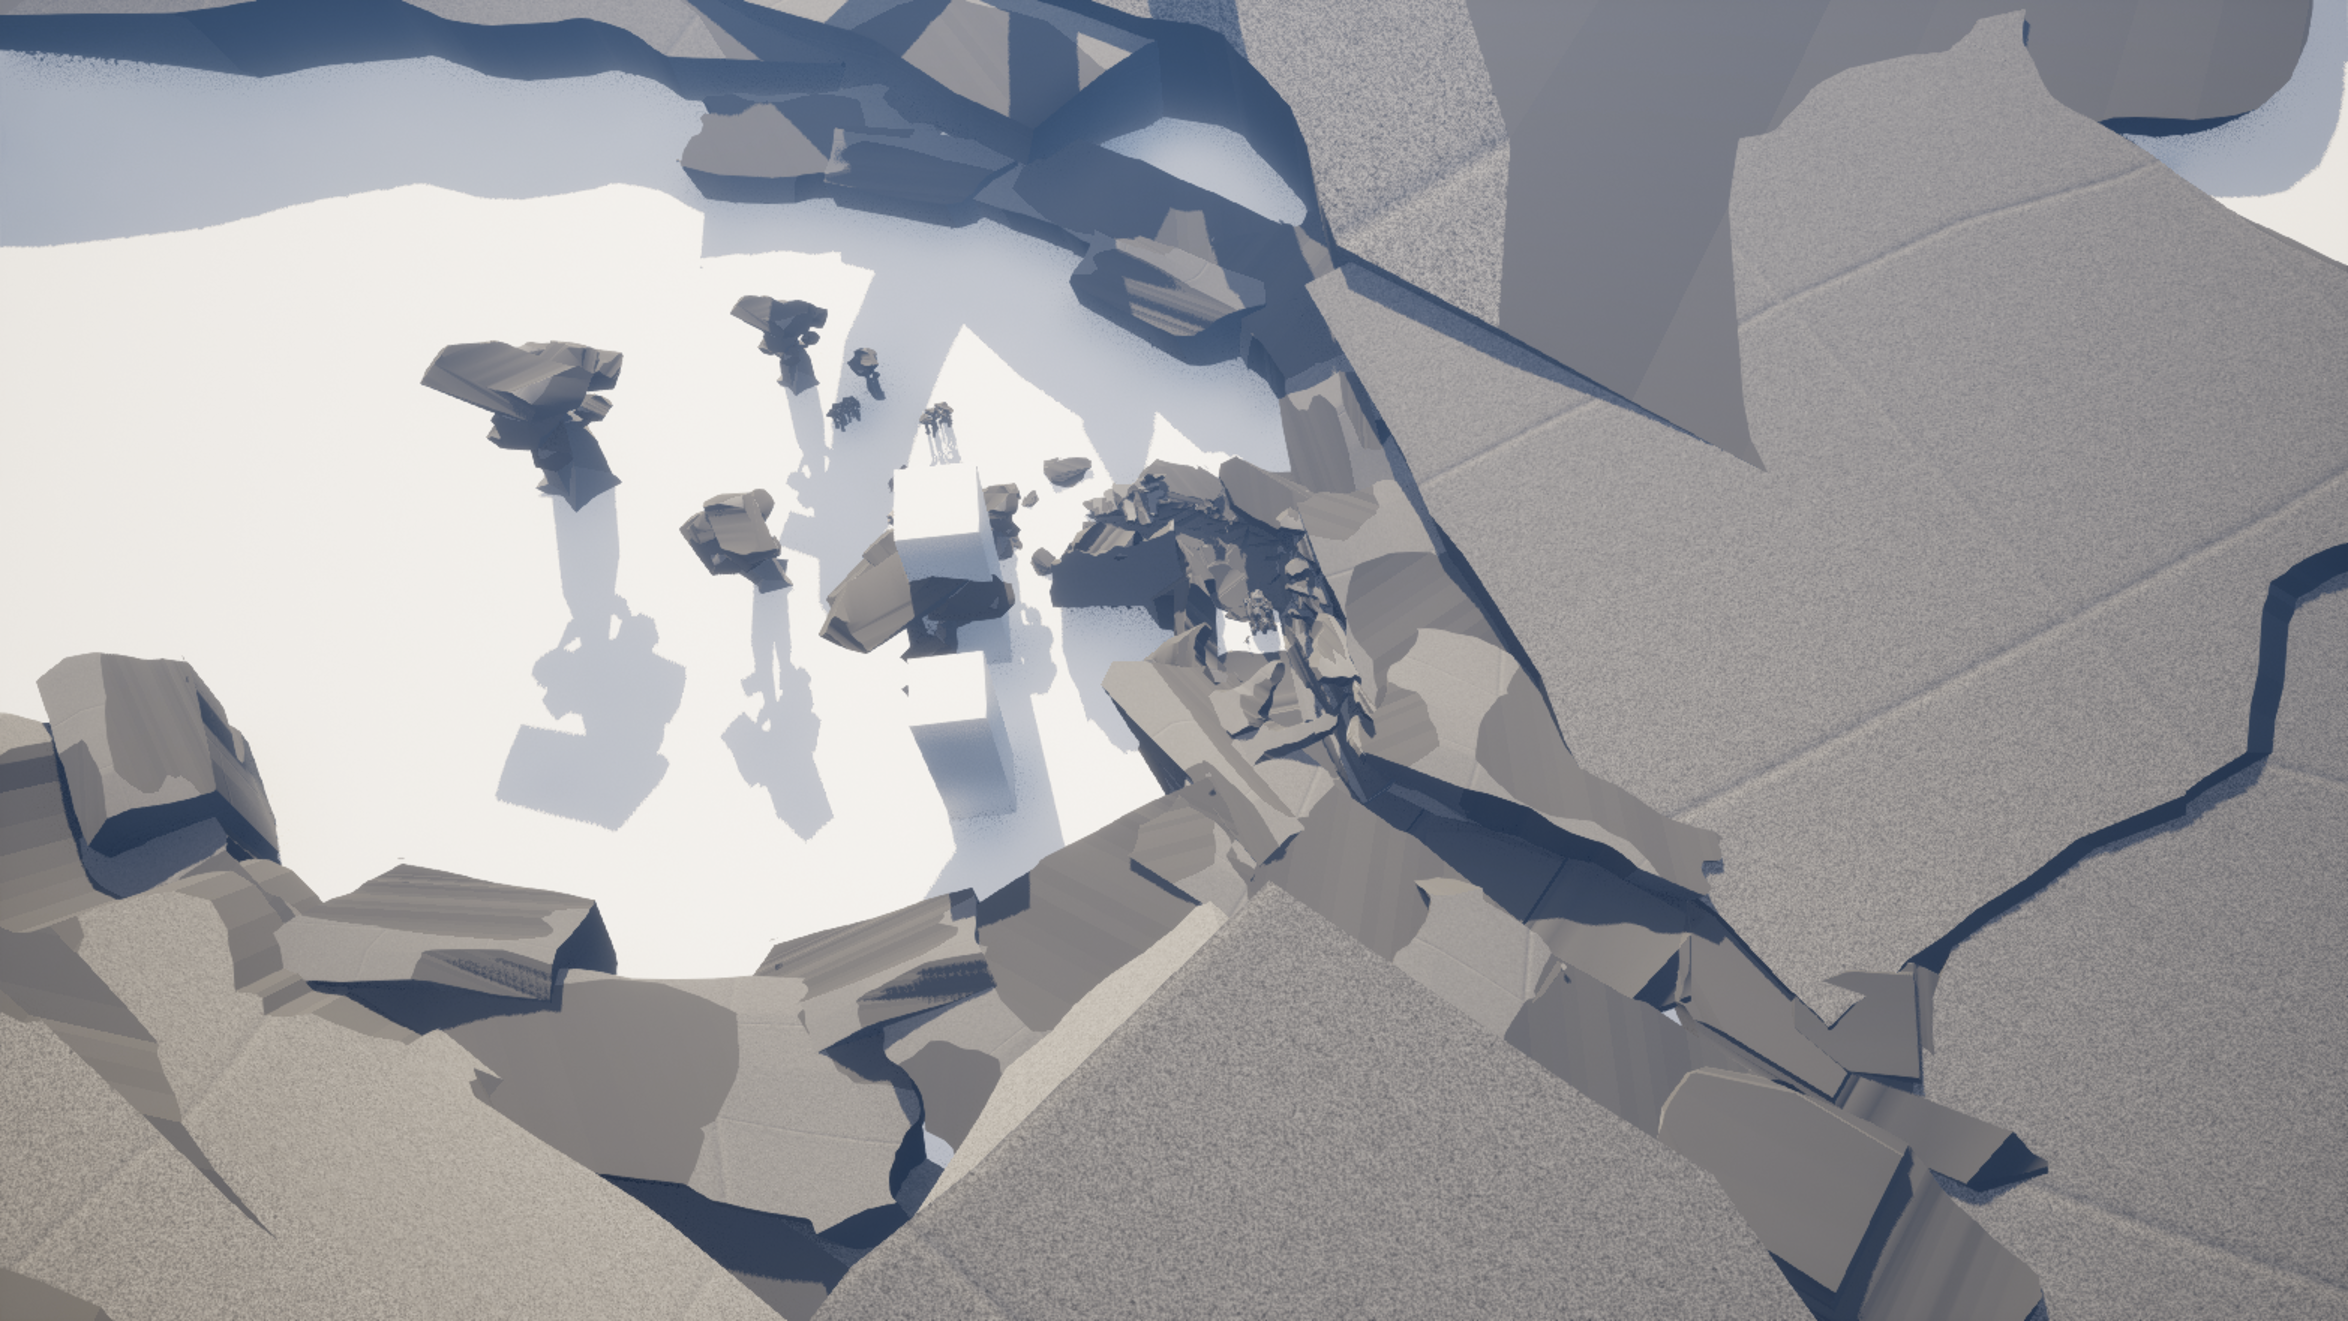
Level blockout
Next stage is creating a blockout based on concepts, references, and level design documents. Blockout can be used after gathering references and forming a clear vision of the final model.
This process allows building rough blockout versions of levels first, adding more details to them step-by-step. Level blockout makes creating a layout easier while freeing specialists from the common difficulties of early fine editing.
3D drafting and design
Specialized 3D design software solutions such as Maya or Blender are essential tools for creating a 3D model of the object required in the final product. An environment artist starts by creating a mesh in the shape of the object.
Secondary and filler objects can be generated automatically, but you will need some manual C++ coding for unique and high-quality models. Maya with Unity or Unreal Engine picked for 3D modeling is the best option for animating the completed sculpture.
UV & texture map design
UV and texture mapping is crucial to the modeling process, as it breathes life into the environment. The fundamental principle behind texturing is to craft a material design that complements the subject matter. UV mapping makes texturing easier by allowing the model to be edited in an expanded form.
In this way, the 2D graphics can be overlaid onto the 3D model, resulting in a seamless and finished asset. This stage can be efficiently handled through either Unreal Engine Texturing or the Unity UV editor.
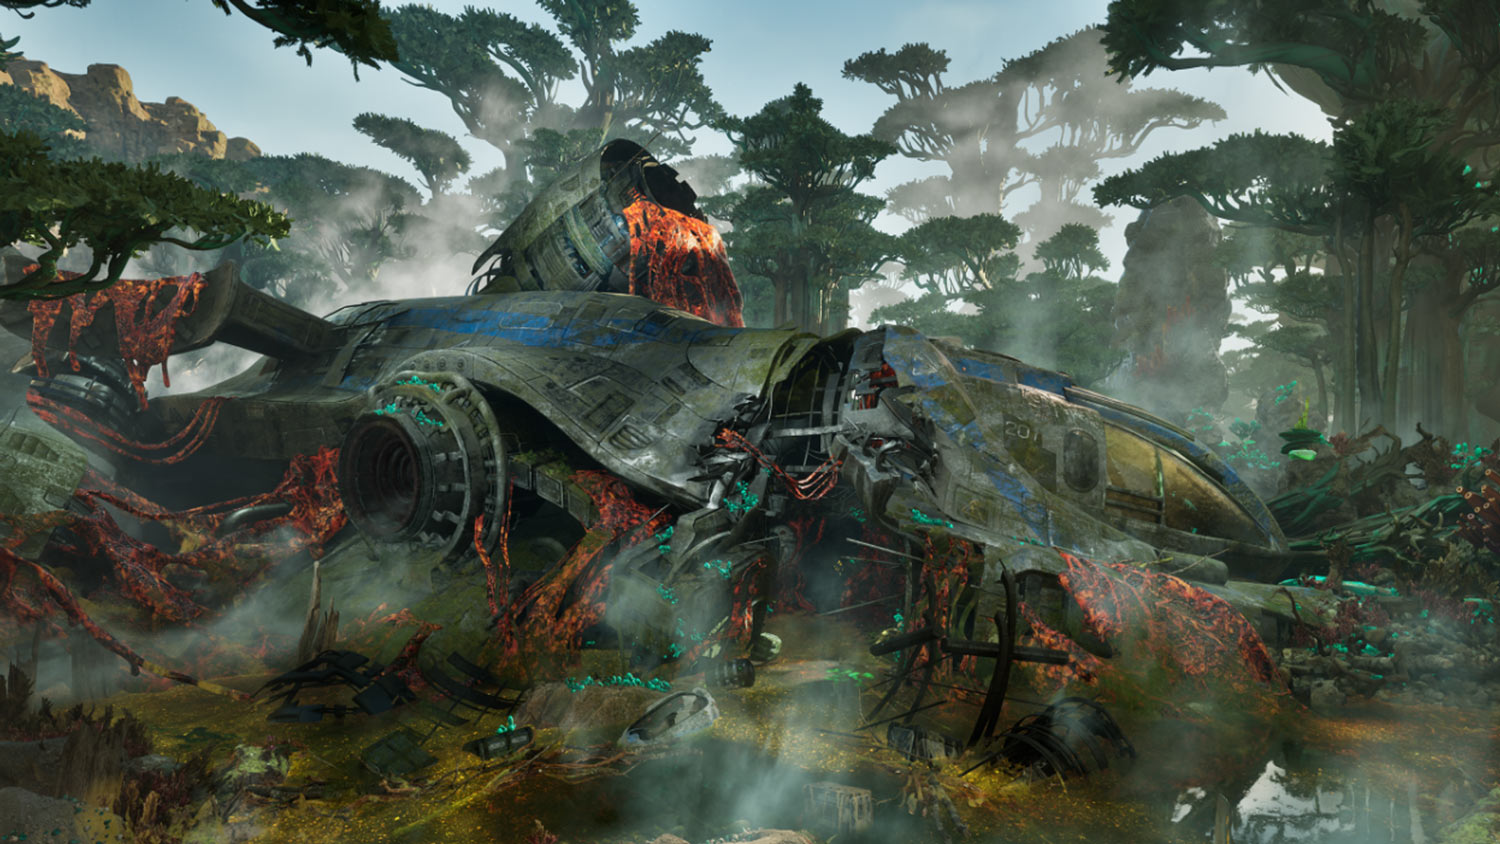
Lighting and VFX as a final touch
Lighting plays a vital role in creating a more realistic and immersive environment. Shadows and light can be used to highlight different parts of the image, making the subject appear more accurate.
The addition of rain, wind, and smog can change the entire atmosphere of a game, setting the mood, pleasing the eye with contrast, and introducing dynamic vibes to it all. There’s a lot of Unreal Engine and Unity documentation available to help you with lighting and post-effects of all sorts.
Hot Tips for Building 3D Environments Efficiently from the Get-Go
In order to create a visually stunning and intricate game environment, and do it in terms of a smooth, time- and cost-efficient workflow, you need two supporting pillars:
- A well-planned stage-by-stage project roadmap;
- Best practices and competitive pro-tips.
You should be fine handling the first point by referring to the stages highlighted just above. As for the second pillar, here are some recommendations from our firsthand project experience.
Get your tools right
This goes for the main engine and all auxiliary tools you might need – take your time to consider options, experiment, and switch toolsets. Keep in mind – Unity can give you more creative freedom at the expense of premium quality and complexity of assets that you can achieve with Unreal Engine.
As for some other pro tips:
- The Media & Entertainment Collection by Autodesk offers a range of top-of-the-line 3D modeling and sculpting tools that are optimized to help you work faster and more efficiently while maintaining a good range of creativity.
- A lot of the overall success of the project depends on its rendering approach – Arnold offers an artist-friendly UI and intuitive controls to quickly see high-quality previews and iterate changes so that you can bring your creations to life in no time.
- And don’t forget the classics that just keep on getting better – 3ds Max is still the best tool for shaping any 3D objects, while Maya helps to pack it all up into scenes and Mudbox – to sculpt, structure, and refine model textures.
Focus on optimization
This is one of the most buzzing topics in today’s gamedev. Game environments can be complex and resource-intensive. To ensure smooth performance, optimize your assets and level design. This is what eager players look forward to the most in upcoming new games.
To keep in line with the demand, use LOD (Level of Detail) techniques to reduce polygon count in distant objects, utilize occlusion culling to avoid rendering unnecessary objects, and bake lighting and shadows whenever possible to improve performance.

Pay attention to scale and proportion
Maintain a sense of scale and proportion in your game environments. This helps create a realistic and immersive experience for players. Consider the relationships between different objects and elements within the game environment, and make sure they are visually coherent and match the overall aesthetic of the game.
Play with lighting
Experiment with different lighting techniques, such as dynamic lighting, ambient occlusion, and global illumination. Pay attention to the color palette and the way light interacts with different materials to create visually appealing and realistic scenes. Keep in mind that warm, pastel tones invite and calm a player down, while sharper color schemes with distinct hints of red fit action–packed scenes better.
Conclusion
Designing expansive game environments is a doable yet expertise-intensive task. Instead of starting from scratch, consider working with a game development studio that has proven reliable with hundreds of projects.
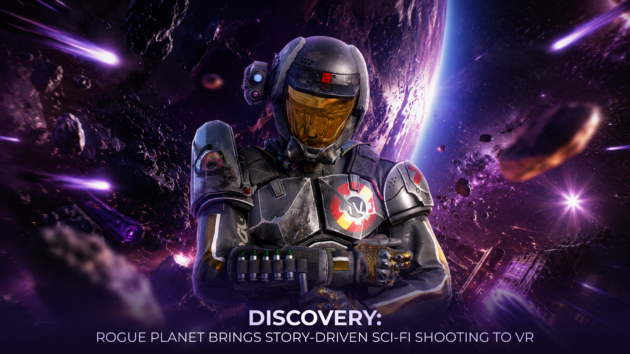
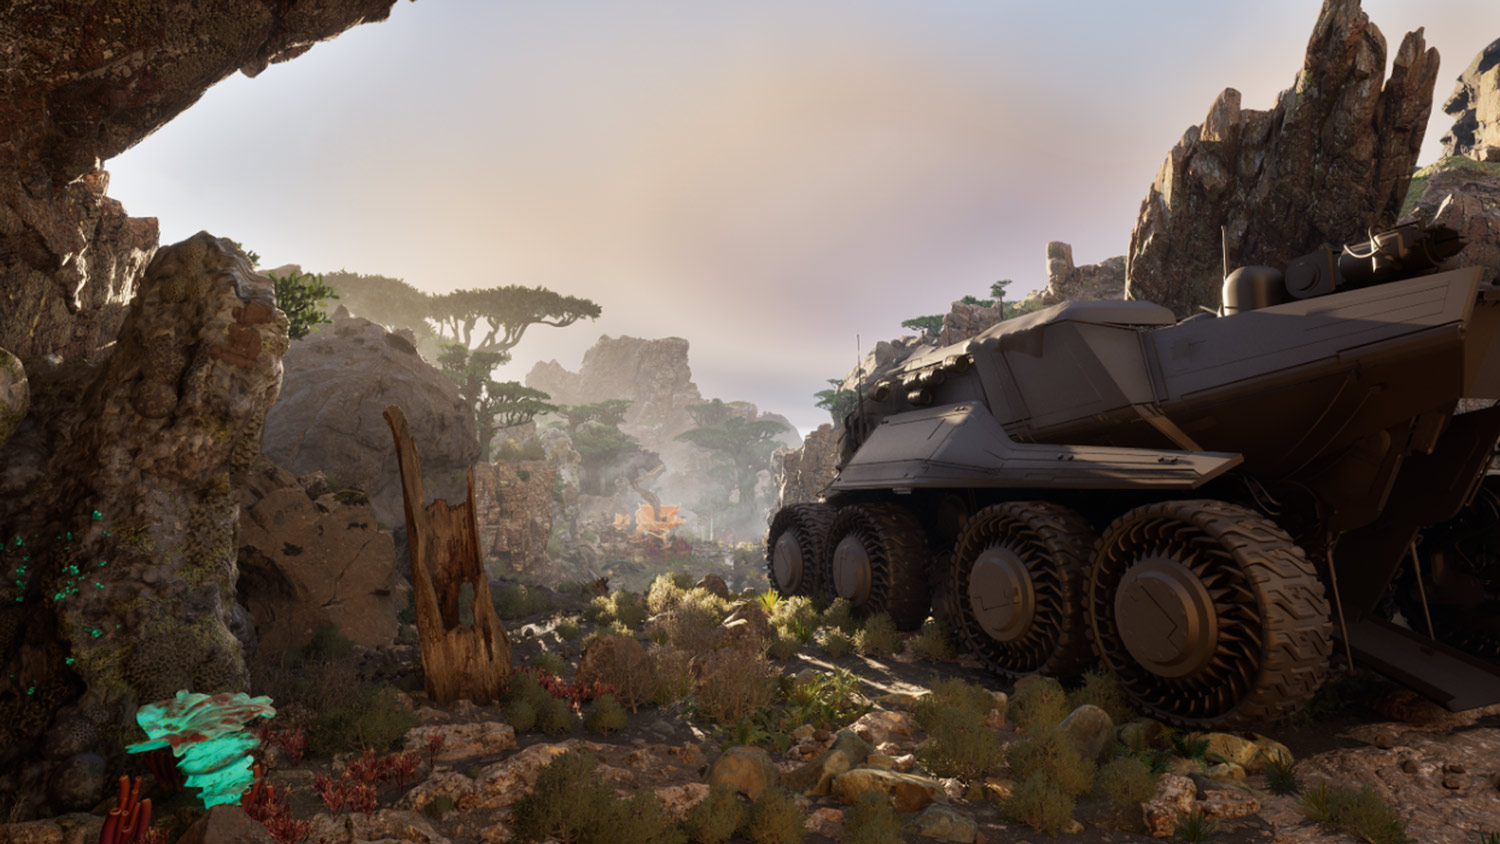
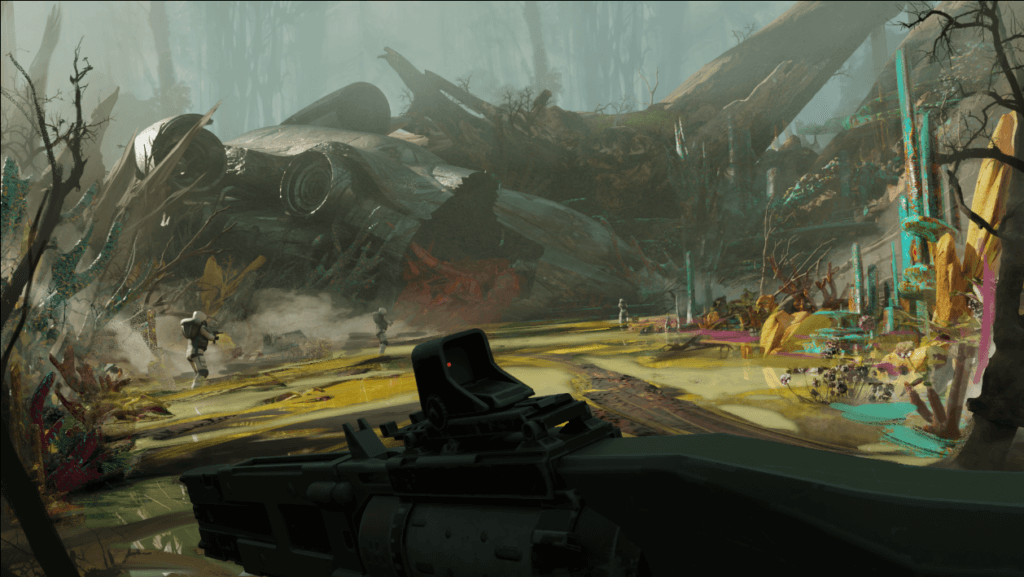
At Stepico, we have creative professionals with years of experience in building custom projects, including custom environmental modeling and asset creation. The art you’ve seen in this article is from our newest project Discovery, a sci-fi shooter built on Unreal Engine.
With just an idea, we have everything needed to bring your project to life and ensure it takes off like a rocket into space. To ensure the players appreciate all aspects of your future game’s high-quality visuals, we offer Unreal game development services along with our art production for you.
Ready to bring your game environment design to life? Contact us today to discuss your needs and receive an excellent product in record time.